See below for Video on using the Point and Click tool
Select Point & Select Extractor Builder as shown below.
A new page will open where user can perform following actions.
Point and Click – Select elements
Add Column
Edit Column
Delete Column
Add Images
To remove pop-up
Point and Click – Select Elements:
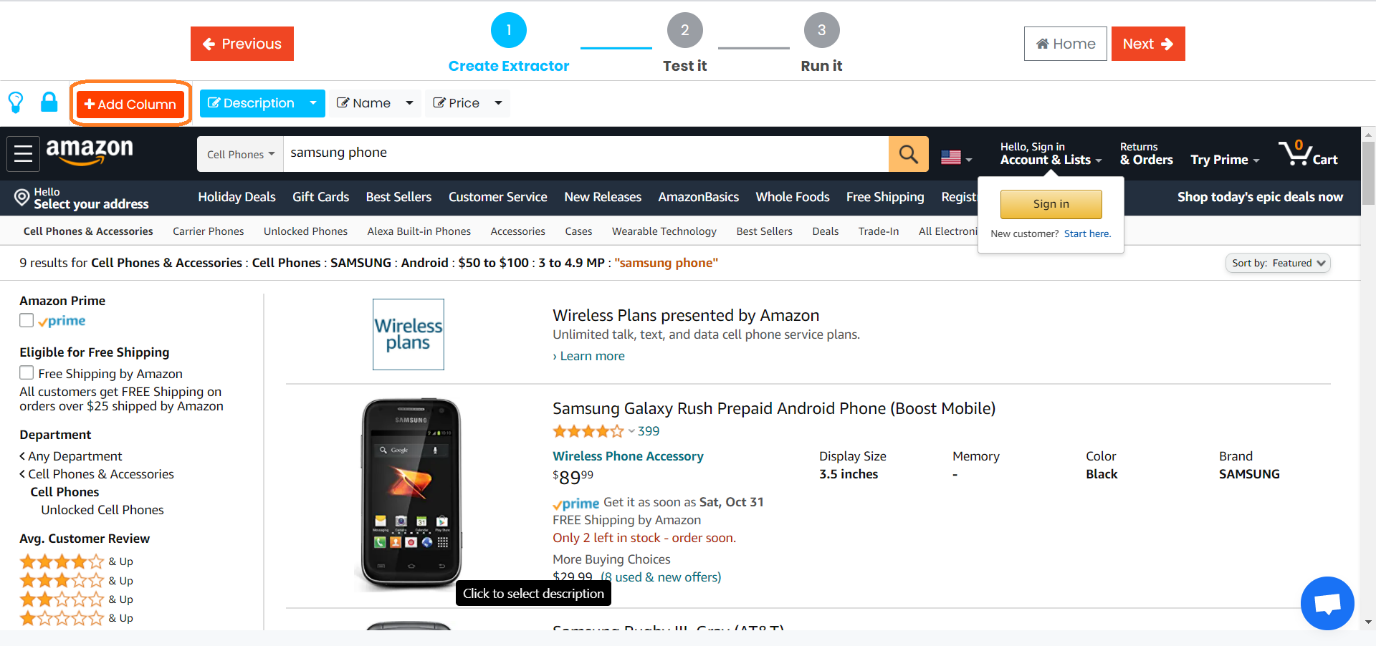
User need to point the particular section as highlighted below in the screenshot.
User need to map the particular section based on the selected column highlighted with blue color. Here Description column needs to be selected first then mapped with the selected section below.
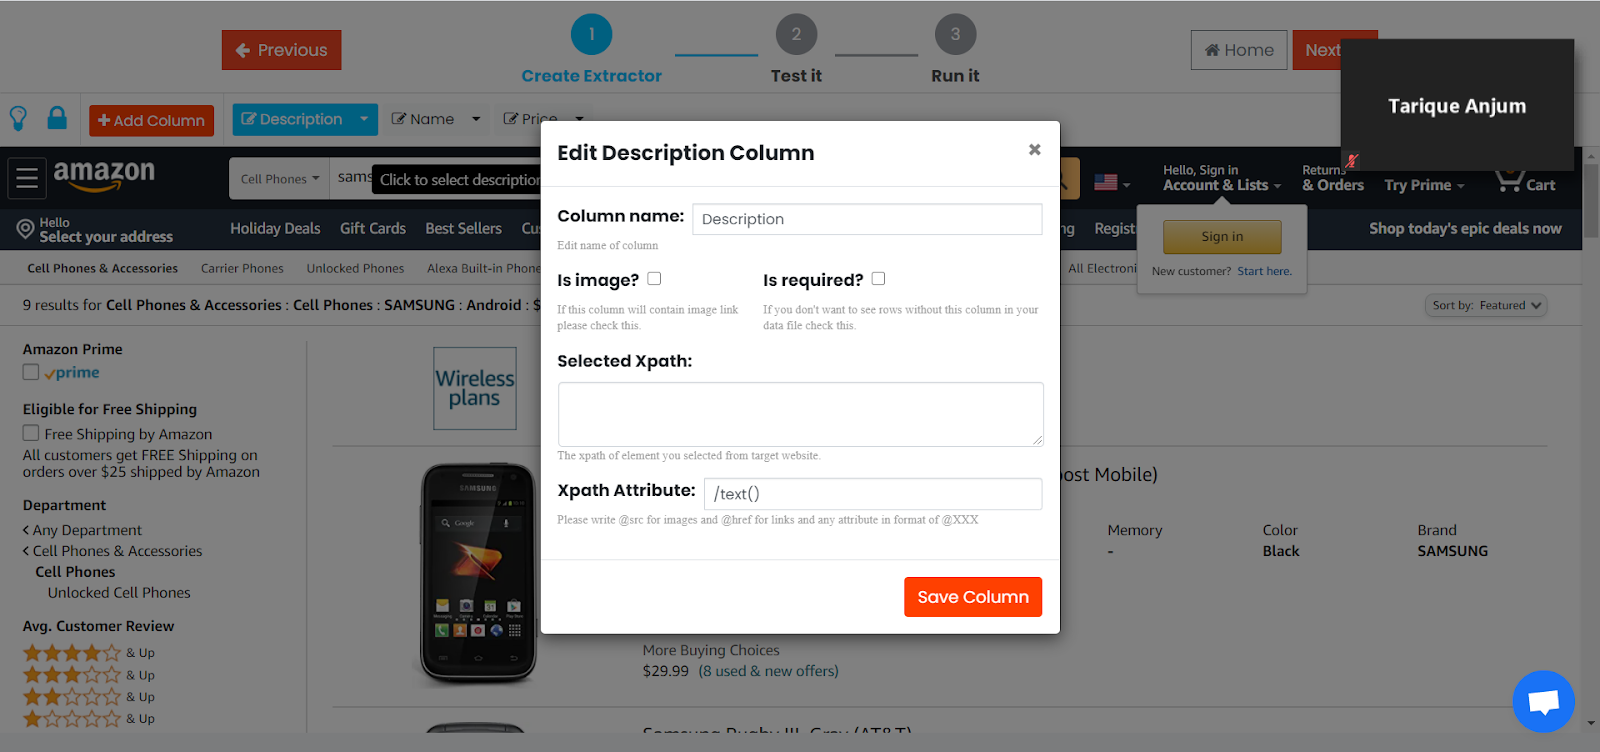
When user click on a section, a pop-up will open where user can edit and update it as shown below.
Pop-up includes -
Column Name: Name of the column like Description, Price etc.
Is Image: If it's an image file then user need to check the checkbox.
Is required: If it’s a mandatory field then user need to check the checkbox.
Selected Xpath: This is the xpath of the element that the point and click selector has captured. Please note that this will not always 100% capture the correct xpath. If you already captured the xpath of the element from the webpage you can paste it in this input box.
Xpath Attribute: By default we set this to a text attribute. Please change to @src if image or @href if a link or any other attribute type which appears in the drop down.
Add Column:
There are two ways to Add column.
Option 1:
To add a column, user need to click on Add Column as highlighted below.
When user click on Add Colum, a pop-up window will open where user need to provide the basic details of the new column. If it is an image, user need to check “Is Image” checkbox. If it is a required field then user need to check the “Is required” checkbox. Then click on “Create Column” button to add a new column.
Option 2:
User should also have another option to add column as shown below.
When the user will click on “Add New” a new section will get added just above to Add new button as shown below where user need to provide the column name and other details like required field and if image is required or not.
When user will add the name of the column and click on “Create New Column”. A new column added as shown below.
Edit Column:
There are three ways to edit a column.
Option 1:
User should have option to click on the column as shown below. When user click on the column, user can see the Edit option to update the column.
When user click on Edit, a pop-up will appear on the screen where user can update the details.
Option 3:
User should have option to click on Edit as shown below.
When user will click on Edit then a new section will get added just below to selected edit column where user will have the provision to update the fields and then click on “Update Column”.
Delete Column:
There are two ways to delete a column.
Option 1:
User should have option to click on the column name as shown below. When user click on the column, user can see the Delete option as highlighted below.
When user click on Delete option, a warning message will appear on the screen where it will ask the user to confirm before deleting the column.
When user click on “OK” the selected column will get deleted and it no more reflect on the screen as shown below.
Option 2:
User should have option to click on Delete button as shown below.
To remove pop-up:
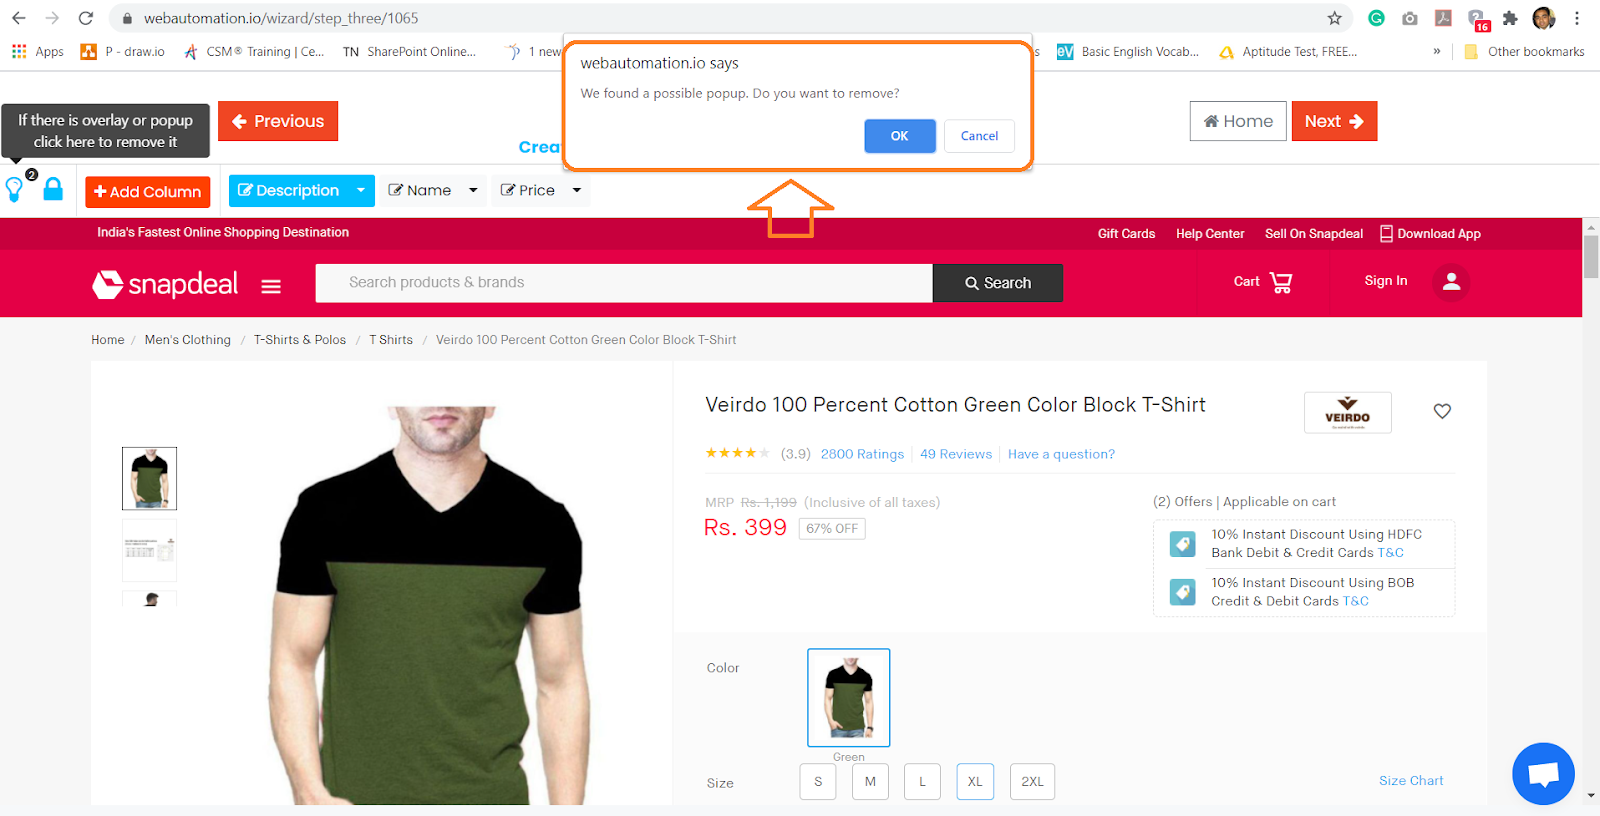
User can able to identify the pop-up in case if there is any pop-up available, it shows with count as highlighted below on the top-left corner.
When user click on pop-up (bulb icon) a warning message will appear on screen “We found a possible popup, Do you want to remove?” as highlighted below.
When user click on “OK” in the above screenshot, pop-up will get removed and the count on the pop-up (bulb icon) will decrease by 1 as shown in the screenshot below.
You should login to leave comments.